Installation
Installing Trento Server
Trento Server can be deployed in different ways depending on your infrastructure and requirements.
Supported deployment methods:
Kubernetes deployment
The subsection uses the following placeholders:
-
TRENTO_SERVER_HOSTNAME: the host name used by the end user to access the console. -
ADMIN_PASSWORD: the password of the admin user created during the installation process.The password must meet the following requirements:
-
minimum length of 8 characters
-
the password must not contain 3 identical numbers or letters in a row (for example, 111 or aaa)
-
the password must not contain 4 sequential numbers or letters (for example, 1234, abcd, ABCD)
-
|
By default, the provided Helm chart uses Traefik as ingress class
Search for Traefik specific usage scenarios on GitHub. In case another ingress controller is used, adapt accordingly. |
Installing Trento Server on an existing Kubernetes cluster
Trento Server consists of a several components delivered as container images and intended for deployment on a Kubernetes cluster. A manual production-ready deployment of these components requires Kubernetes knowledge. Customers without in-house Kubernetes expertise and those who want to try Trento with a minimum of effort, can use the Trento Helm chart. This approach automates the deployment of all the required components on a single Kubernetes cluster node. You can use the Trento Helm chart to install Trento Server on a existing Kubernetes cluster as follows:
|
The examples in this section do not specify a Kubernetes namespace for simplicity. By default, Helm installs to the For production deployments, create and use a dedicated namespace. Example: |
|
The examples in this section deliver an installation of Trento Server without Prometheus. If you want to have Prometheus installed and enabled along Trento Server refer to [sec-prometheus-integration]. |
-
Install Helm:
curl https://raw.githubusercontent.com/helm/helm/master/scripts/get-helm-3 | bash -
Connect Helm to an existing Kubernetes cluster.
-
Use Helm to install Trento Server with the Trento Helm chart:
helm upgrade \
   --install trento-server oci://registry.suse.com/trento/trento-server \
   --set global.trentoWeb.origin=TRENTO_SERVER_HOSTNAME \
   --set trento-web.adminUser.password=ADMIN_PASSWORD \
   --set prometheus.enabled=false
Where:
global.trentoWeb.origin-
Uses the provided hostname (for example,
trento.example.com) to configure internal functionalities such as the interactive API portal, websockets, or certificate generation. trento-web.adminUser.password-
Sets the initial password for the default admin account to access the Trento console.
prometheus.enabled-
Enables or disables the deployment of Prometheus. For more information, see [sec-prometheus-integration].
-
To verify that the Trento Server installation was successful, open the URL of the Trento Web (
http://TRENTO_SERVER_HOSTNAME) from a workstation on the SAP administrator’s LAN.
Installing Trento Server on K3s
If you do not have a Kubernetes cluster, or you have one but you do not want to use it for Trento, you can use SUSE Rancher’s K3s as an alternative. To deploy Trento Server on K3s, you need a server or VM (see [sec-trento-server-requirements] for minimum requirements) and follow the steps in the following procedure.
|
The following procedure deploys Trento Server on a single-node K3s cluster. Note that this setup is not recommended for production use. |
-
Log in to the Trento Server host.
-
Install K3s either as root or a non-root user.
-
Installing as user root:
curl -sfL https://get.k3s.io | INSTALL_K3S_SKIP_SELINUX_RPM=true sh -
Installing as a non-root user:
curl -sfL https://get.k3s.io | INSTALL_K3S_SKIP_SELINUX_RPM=true sh -s - --write-kubeconfig-mode 644
-
-
Install Helm as root.
curl https://raw.githubusercontent.com/helm/helm/master/scripts/get-helm-3 | bash -
Set the
KUBECONFIGenvironment variable for the same user that installed K3s:export KUBECONFIG=/etc/rancher/k3s/k3s.yaml -
With the same user that installed K3s, install Trento Server using the Helm chart:
helm upgrade \
   --install trento-server oci://registry.suse.com/trento/trento-server \
   --set global.trentoWeb.origin=TRENTO_SERVER_HOSTNAME \
   --set trento-web.adminUser.password=ADMIN_PASSWORD \
   --set prometheus.enabled=false
Where:
global.trentoWeb.origin-
Uses the provided hostname (for example,
trento.example.com) to configure internal functionalities such as the interactive API portal, websockets, or certificate generation. trento-web.adminUser.password-
Sets the initial password for the default admin account to access the Trento console.
prometheus.enabled-
Enables or disables the deployment of Prometheus. For more information, see [sec-prometheus-integration].
-
Monitor the creation and start-up of the Trento Server pods, and wait until they are ready and running:
watch kubectl get podsAll pods must be in the ready and running state.
-
Log out of the Trento Server host.
-
To verify that the Trento Server installation was successful, open the URL of the Trento Web (
http://TRENTO_SERVER_HOSTNAME) from a workstation on the SAP administrator’s LAN.
Deploying Trento Server on selected nodes
If you use a multi-node Kubernetes cluster, it is possible to deploy Trento Server images on selected nodes by specifying the field nodeSelector in the helm upgrade command as follows:
 helm upgrade \
   --install trento-server oci://registry.suse.com/trento/trento-server \
   --set global.trentoWeb.origin=TRENTO_SERVER_HOSTNAME \
   --set trento-web.adminUser.password=ADMIN_PASSWORD \
   --set postgresql.primary.nodeSelector.LABEL=VALUE \
   --set trento-web.nodeSelector.LABEL=VALUE \
   --set prometheus.enabled=false
Replace LABEL and VALUE with the actual label key and value of your target node.
Enabling email alerts
Email alerting feature notifies the SAP Basis administrator about important changes in the SAP Landscape being monitored by Trento.
The reported events include the following:
-
Host heartbeat failed
-
Cluster health detected critical
-
Database health detected critical
-
SAP System health detected critical
This feature is disabled by default. It can be enabled at installation time or anytime at a later stage. In both cases, the procedure is the same and uses the following placeholders:
SMTP_SERVER-
The SMTP server designated to send email alerts
SMTP_PORT-
Port on the SMTP server
SMTP_USER-
User name to access SMTP server
SMTP_PASSWORD-
Password to access SMTP server
ALERTING_SENDER-
Sender email for alert notifications
ALERTING_RECIPIENT-
Email address to receive alert notifications.
The command to enable email alerts is as follows:
helm upgrade \
   --install trento-server oci://registry.suse.com/trento/trento-server \
   --set global.trentoWeb.origin=TRENTO_SERVER_HOSTNAME \
   --set trento-web.adminUser.password=ADMIN_PASSWORD \
   --set prometheus.enabled=false \
   --set trento-web.alerting.enabled=true \
   --set trento-web.alerting.smtpServer=SMTP_SERVER \
   --set trento-web.alerting.smtpPort=SMTP_PORT \
   --set trento-web.alerting.smtpUser=SMTP_USER \
   --set trento-web.alerting.smtpPassword=SMTP_PASSWORD \
   --set trento-web.alerting.sender=ALERTING_SENDER \
   --set trento-web.alerting.recipient=ALERTING_RECIPIENT
Enabling SSL
Ingress may be used to provide SSL termination for the Web component of Trento Server. This would allow to encrypt the communication from the agent to the server, which is already secured by the corresponding API key. It would also allow HTTPS access to the Web console with trusted certificates.
Configuration must be done in the tls section of the values.yaml file of the chart of the Trento Server Web component.
For details on the required Ingress setup and configuration, refer to: https://kubernetes.io/docs/concepts/services-networking/ingress/. Particularly, refer to section https://kubernetes.io/docs/concepts/services-networking/ingress/#tls for details on the secret format in the YAML configuration file.
Additional steps are required on the Agent side.
systemd deployment
A systemd-based installation of the Trento Server using RPM packages can be performed manually on the latest supported versions of SUSE Linux Enterprise Server for SAP applications, from 15 SP4 up to 16. For installations on service packs other than the current one, make sure to update the repository URL as described in the relevant notes throughout this guide.
Install Trento dependencies
Install PostgreSQL
The current instructions are tested with the following PostgreSQL versions:
| SUSE Linux Enterprise Server for SAP applications | PostgreSQL Version |
|---|---|
15 SP4 |
14.10 |
15 SP5 |
15.5 |
15 SP6 |
16.9 |
15 SP7 |
17.5 |
16.0 |
17.6 |
Using a different version of PostgreSQL may require different steps or configurations, especially when changing the major number. For more details, refer to the official PostgreSQL documentation.
-
Install PostgreSQL server:
sudo zypper install postgresql-server -
Enable and start PostgreSQL server:
sudo systemctl enable --now postgresql
Configure PostgreSQL
-
Start
psqlwith thepostgresuser to open a connection to the database:sudo su - postgres psql -
Initialize the databases in the
psqlconsole:CREATE DATABASE wanda; CREATE DATABASE trento; CREATE DATABASE trento_event_store; -
Create the users:
The values
WANDA_USER,WANDA_PASSWORD,TRENTO_USER, andWEB_PASSWORDare placeholders. Replace them with your own secure values before running these commands.CREATE USER WANDA_USER WITH PASSWORD 'WANDA_PASSWORD'; CREATE USER TRENTO_USER WITH PASSWORD 'WEB_PASSWORD'; -
Grant required privileges to the users and close the connection:
\c wanda GRANT ALL ON SCHEMA public TO WANDA_USER; \c trento GRANT ALL ON SCHEMA public TO TRENTO_USER; \c trento_event_store GRANT ALL ON SCHEMA public TO TRENTO_USER; \q -
Exit the
postgresuser session:exit -
Allow the PostgreSQL database to receive connections to the respective databases and users. To do this, add the following to
/var/lib/pgsql/data/pg_hba.conf:The
pg_hba.conffile works sequentially. This means that the rules on the top have preference over the ones below. The following example shows a permissive address range. So for this to work, the new entries must be written at the top of thehostsection. For further information, refer to the pg_hba.conf documentation.host wanda WANDA_USER 0.0.0.0/0 scram-sha-256 host trento,trento_event_store TRENTO_USER 0.0.0.0/0 scram-sha-256 -
Allow PostgreSQL to bind on all network interfaces in
/var/lib/pgsql/data/postgresql.confby changing the following line:listen_addresses = '*' -
Restart PostgreSQL to apply the changes:
sudo systemctl restart postgresql
Install RabbitMQ
-
Install RabbitMQ server:
sudo zypper install rabbitmq-server -
Allow connections from external hosts by modifying
/etc/rabbitmq/rabbitmq.conf, so the Trento-agent can reach RabbitMQ:listeners.tcp.default = 5672 -
If firewalld is running, add a rule to firewalld:
sudo firewall-cmd --zone=public --add-port=5672/tcp --permanent sudo firewall-cmd --reload -
Enable the RabbitMQ service:
sudo systemctl enable --now rabbitmq-server
Configure RabbitMQ
To configure RabbitMQ for a production system, follow the official suggestions in the RabbitMQ guide.
-
Create a new RabbitMQ user:
The values
TRENTO_USERandTRENTO_USER_PASSWORDare placeholders. Replace them with your own secure values before running these commands.sudo rabbitmqctl add_user TRENTO_USER TRENTO_USER_PASSWORD -
Create a virtual host:
sudo rabbitmqctl add_vhost vhost -
Set permissions for the user on the virtual host:
sudo rabbitmqctl set_permissions -p vhost TRENTO_USER ".*" ".*" ".*"
Install Trento using RPM packages
The trento-web and trento-wanda packages are available by default on supported SUSE Linux Enterprise Server for SAP applications distributions.
Install Trento web, wanda and checks:
sudo zypper install trento-web trento-wandaCreate the configuration files
Both services depend on respective configuration files. They must be
placed in /etc/trento/trento-web and /etc/trento/trento-wanda
respectively, and examples of how to modify them are available in
/etc/trento/trento-web.example and /etc/trento/trento-wanda.example.
|
You can create the content of the secret variables such as
|
-
Create the
/etc/trento/trento-webconfiguration file. For example:The values
TRENTO_USER,TRENTO_USER_PASSWORD, andWEB_PASSWORDare placeholders. Replace them with your own secure values before running these commands.# /etc/trento/trento-web AMQP_URL=amqp://TRENTO_USER:TRENTO_USER_PASSWORD@localhost:5672/vhost DATABASE_URL=ecto://TRENTO_USER:WEB_PASSWORD@localhost/trento EVENTSTORE_URL=ecto://TRENTO_USER:WEB_PASSWORD@localhost/trento_event_store ENABLE_ALERTING=false CHARTS_ENABLED=false ADMIN_USER=admin ADMIN_PASSWORD=trentodemo ENABLE_API_KEY=true PORT=4000 LOG_LEVEL=info TRENTO_WEB_ORIGIN=trento.example.com IPV4_OR_IPV6=ipv4 SECRET_KEY_BASE=some-secret ACCESS_TOKEN_ENC_SECRET=some-secret REFRESH_TOKEN_ENC_SECRET=some-secret CHECKS_SERVICE_BASE_URL=/wanda OAS_SERVER_URL=https://trento.example.com-
The
LOG_LEVELvariable sets how much detail Trento Web writes to the log. The default value isinfo. For more information, see [sec-configuring-log-levels]. -
The
TRENTO_WEB_ORIGINvariable configures internal functionalities such as the interactive API portal, websockets, or certificate generation.Ensure that a valid hostname, FQDN, or IP address is configured in
TRENTO_WEB_ORIGINwhen using HTTPS. Otherwise, websocket connections will fail, preventing real-time updates in the web interface. -
The
IPV4_OR_IPV6variable defines whether the Trento Web service binds to an IPv4 or IPv6 address. Set it according to what is available on the host at the time the service starts. The accepted values areipv4andipv6(case-insensitive). If the variable is not set, Trento Web binds to IPv4. -
The
ADMIN_PASSWORDvariable must meet the following requirements:-
Minimum of 8 characters
-
The password not contain 3 consecutive identical numbers or letters (for example, 111 or aaa)
-
The password must not contain 4 consecutive numbers or letters (for example, 1234, abcd, ABCD)
-
-
The
ENABLE_ALERTINGvariable enables the alerting system to receive email notifications. SetENABLE_ALERTINGtotrueand add additional variables to the/etc/trento/trento-webto enable the feature:# /etc/trento/trento-web ENABLE_ALERTING=true ALERT_SENDER=<<SENDER_EMAIL_ADDRESS>> ALERT_RECIPIENT=<<RECIPIENT_EMAIL_ADDRESS>> SMTP_SERVER=<<SMTP_SERVER_ADDRESS>> SMTP_PORT=<<SMTP_PORT>> SMTP_USER=<<SMTP_USER>> SMTP_PASSWORD=<<SMTP_PASSWORD>>
-
-
Create the
/etc/trento/trento-wandaconfiguration file. For example:The values
WANDA_USER,WANDA_PASSWORD,TRENTO_USER, andTRENTO_USER_PASSWORDare placeholders. Replace them with your own secure values before running these commands.# /etc/trento/trento-wanda CORS_ORIGIN=http://localhost AMQP_URL=amqp://TRENTO_USER:TRENTO_USER_PASSWORD@localhost:5672/vhost DATABASE_URL=ecto://WANDA_USER:WANDA_PASSWORD@localhost/wanda PORT=4001 LOG_LEVEL=info IPV4_OR_IPV6=ipv4 SECRET_KEY_BASE=some-secret OAS_SERVER_URL=https://trento.example.com/wanda AUTH_SERVER_URL=http://localhost:4000Ensure the
IPV4_OR_IPV6variable matches the value you configured for the Trento Web service in the previous step. -
Secure the configuration files.
To protect sensitive information, the configuration files must have
600permissions so that only therootuser can read them:sudo chmod 600 /etc/trento/trento-web sudo chmod 600 /etc/trento/trento-wanda
Start the services
|
In some SUSE Linux Enterprise Server for SAP applications environments, SELinux may be enabled and set to enforcing mode by default. If Trento services fail to start or show permission-related errors, check the SELinux status: If SELinux is set to enforcing, switch it to permissive mode either temporarily or permanently:
|
Enable and start the services:
sudo systemctl enable --now trento-web trento-wandaCheck the health status of Trento Web and Trento Wanda
You can check if Trento Web and Trento Wanda services function correctly by
accessing the healthz and readyz API.
If Trento web and wanda are ready, and the database connection is set up correctly, the output should be as follows:
{"ready":true}{"database":"pass"}-
Check Trento Web health status using
curl:curl http://localhost:4000/api/readyzcurl http://localhost:4000/api/healthz -
Check Trento Wanda health status using
curl:curl http://localhost:4001/api/readyzcurl http://localhost:4001/api/healthz
Install and configure NGINX
-
Install NGINX package:
sudo zypper install nginx -
If firewalld is running, add firewalld rules for HTTP and HTTPS:
sudo firewall-cmd --zone=public --add-service=https --permanent sudo firewall-cmd --zone=public --add-service=http --permanent sudo firewall-cmd --reload -
Start and enable NGINX:
sudo systemctl enable --now nginx -
Create a
/etc/nginx/conf.d/trento.confTrento configuration file:map $http_upgrade $connection_upgrade { default upgrade; '' close; } upstream web { server 127.0.0.1:4000 max_fails=5 fail_timeout=60s; } upstream wanda { server 127.0.0.1:4001 max_fails=5 fail_timeout=60s; } server { # Redirect HTTP to HTTPS listen 80; server_name trento.example.com; return 301 https://$host$request_uri; } server { server_name trento.example.com; listen 443 ssl; ssl_certificate /etc/nginx/ssl/certs/trento.crt; ssl_certificate_key /etc/ssl/private/trento.key; ssl_protocols TLSv1.2 TLSv1.3; ssl_ciphers 'ECDHE-ECDSA-AES128-GCM-SHA256:ECDHE-RSA-AES128-GCM-SHA256:ECDHE-ECDSA-AES256-GCM-SHA384:ECDHE-RSA-AES256-GCM-SHA384:DHE-RSA-AES128-GCM-SHA256:DHE-RSA-AES256-GCM-SHA384'; ssl_prefer_server_ciphers on; ssl_session_cache shared:SSL:10m; # Wanda rule location /wanda/ { allow all; # Proxy Headers proxy_http_version 1.1; proxy_set_header X-Forwarded-For $proxy_add_x_forwarded_for; proxy_set_header Host $http_host; proxy_set_header X-Cluster-Client-Ip $remote_addr; # Important Websocket Bits! proxy_set_header Upgrade $http_upgrade; proxy_set_header Connection "upgrade"; # Add final slash to replace the location path value by the value in proxy_pass # https://nginx.org/en/docs/http/ngx_http_proxy_module.html#proxy_pass proxy_pass http://wanda/; } # Web rule location / { # this endpoint should not be accessible publicly # it is internally used by wanda to introspect access tokens and personal access tokens location /api/session/token/introspect { deny all; return 404; } allow all; # Proxy Headers proxy_http_version 1.1; proxy_set_header X-Forwarded-For $proxy_add_x_forwarded_for; proxy_set_header Host $http_host; proxy_set_header X-Cluster-Client-Ip $remote_addr; # The Important Websocket Bits! proxy_set_header Upgrade $http_upgrade; proxy_set_header Connection "upgrade"; proxy_pass http://web; } }The previous example reaches Trento Web and Trento Wanda over IPv4. If you set
IPV4_OR_IPV6=ipv6in the service configuration files, adjust the NGINX configuration accordingly:-
Change the upstream addresses from
127.0.0.1to[::1]. -
Add IPv6 listeners to the
serverblocks:listen [::]:80;andlisten [::]:443 ssl;.
-
Prepare SSL certificate for NGINX
Create or provide a certificate for NGINX to enable SSL for Trento. Choose one of the following methods:
-
To manually generate a self-signed certificate, see Create a self-signed certificate.
-
To automate obtaining a signed certificate with Let’s Encrypt, see Create a signed certificate with Let’s Encrypt using PackageHub repository.
-
To provide an existing signed certificate, you can use the procedure in Create a self-signed certificate, skipping step 1 and adapting the remaining steps to use your own files.
Create a self-signed certificate
Manually generate a self-signed certificate and ensure it is trusted by the system.
-
Generate a self-signed certificate:
Adjust
subjectAltName = DNS:trento.example.comby replacingtrento.example.comwith your domain and change the value5to the number of days for which you need the certificate to be valid. For example,-days 365for one year.openssl req -newkey rsa:2048 --nodes -keyout trento.key -x509 -days 5 -out trento.crt -addext "subjectAltName = DNS:trento.example.com" -
Copy the generated
trento.keyto a location accessible by NGINX:sudo cp trento.key /etc/ssl/private/trento.key -
Create a directory for the generated
trento.crtfile. The directory must be accessible by NGINX:sudo mkdir -p /etc/nginx/ssl/certs/ -
Copy the generated
trento.crtfile to the created directory:sudo cp trento.crt /etc/nginx/ssl/certs/trento.crt -
Ensure the self-signed certificate is trusted:
-
Convert
trento.crtto the PEM format:openssl x509 -in trento.crt -out trento.pem -outform PEM -
Copy the certificate in PEM format to
/etc/pki/trust/anchors/:sudo cp trento.pem /etc/pki/trust/anchors/ -
Run the
update-ca-certificatescommand:sudo update-ca-certificates
-
-
Check the NGINX configuration:
sudo nginx -tIf the configuration is correct, the output should be as follows:
nginx: the configuration file /etc/nginx/nginx.conf syntax is ok
nginx: configuration file /etc/nginx/nginx.conf test is successful
If there are issues with the configuration, the output indicates what needs to be adjusted.
-
Enable NGINX:
sudo systemctl restart nginx
Create a signed certificate with Let’s Encrypt using PackageHub repository
Automate obtaining a signed certificate with Let’s Encrypt and configure NGINX to use it.
-
Enable the PackageHub repository (replace
x.xwith your OS version, for example15.7):sudo SUSEConnect --product PackageHub/x.x/x86_64 sudo zypper refresh -
Find the Certbot NGINX plug-in package available in your current Service Pack:
zypper search certbot-nginxExample output:
S | Name | Summary | Type ---+-------------------------+--------------------------+-------- | python313-certbot-nginx | Nginx plugin for Certbot | package -
Install Certbot and its NGINX plug-in. Use the specific package name returned in the output of the previous step. For example:
sudo zypper install certbot python313-certbot-nginx -
Obtain a certificate and configure NGINX with Certbot:
Replace
trento.example.comwith your domain. For more information, refer to Certbot instructions for NGINXsudo certbot --nginx -d trento.example.comCertbot certificates are valid for 90 days. Refer to the above link for details on how to renew certificates.
Installing Trento Agents
Before you can install a Trento Agent, you must obtain the API key of your Trento Server. Proceed as follows:
-
Open the URL of the Trento Web console. It prompts you for a user name and password:
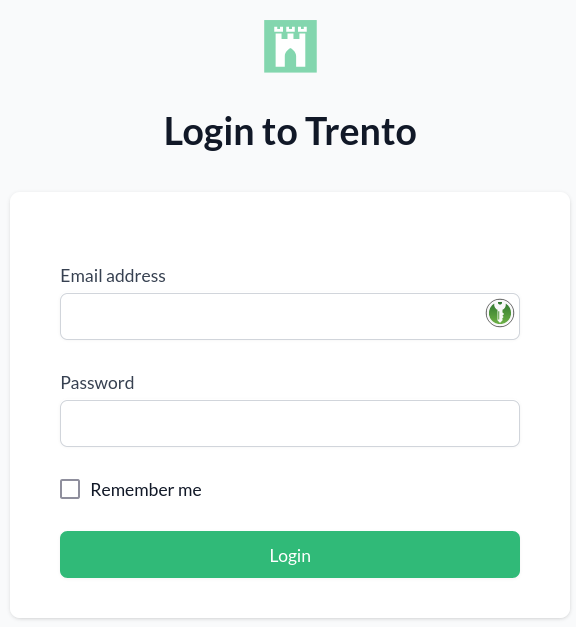
-
Enter the credentials for the
adminuser (specified during installation of Trento Server). -
Click Login.
-
When you are logged in, go to Settings:
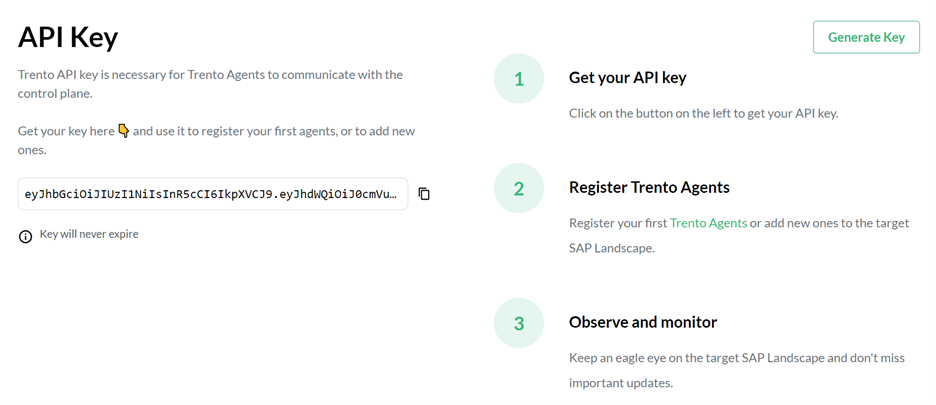
-
Click the Copy button to copy the key to the clipboard.
Install the Trento Agent on an SAP host and register it with the Trento Server as follows:
-
Install the package:
sudo zypper ref
sudo zypper install trento-agent
A configuration file named
/agent.yamlis created under/etc/trento/in SUSE Linux Enterprise Server for SAP applications 15 or under/usr/etc/trento/in SUSE Linux Enterprise Server for SAP applications 16.To protect sensitive information, the
agent.yamlconfiguration file is automatically created with600permissions so that only therootuser can read or modify it. -
Open the configuration file and uncomment (remove the
#character) the entries forfacts-service-url,server-urlandapi-key. Update the values if necessary:-
facts-service-url: the address of the AMQP RabbitMQ service used for communication with the checks engine (wanda). The correct value of this parameter depends on how Trento Server was deployed.In a Kubernetes deployment, it is amqp://trento:trento@TRENTO_SERVER_HOSTNAME:5672/. If the default RabbitMQ username and password (
trento:trento) were updated using Helm, the parameter must use a user-defined value.In a systemd deployment, the correct value is
amqp://TRENTO_USER:TRENTO_USER_PASSWORD@TRENTO_SERVER_HOSTNAME:5672/vhost. IfTRENTO_USERandTRENTO_USER_PASSWORDhave been replaced with custom values, you must use them. -
server-url: URL for the Trento Server (http://TRENTO_SERVER_HOSTNAME) -
api-key: the API key retrieved from the Web console -
prometheus-mode: Determines how metrics are collected. Valid values arepull(default) fornode_exporter-based collection, orpushfor Grafana Alloy-based collection. See Prometheus metrics configuration for details.
-
-
If SSL termination has been enabled on the server side, you can encrypt the communication from the agent to the server as follows:
-
Provide an HTTPS URL instead of an HTTP one.
-
Import the certificate from the Certificate Authority that has issued your Trento Server SSL certificate into the Trento Agent host as follows:
-
Copy the CA certificate in the PEM format to
/etc/pki/trust/anchors/. If the CA certificate is in the CRT format, convert it to PEM using the followingopensslcommand:openssl x509 -in mycert.crt -out mycert.pem -outform PEM -
Run the
update-ca-certificatescommand.
-
-
-
Start the Trento Agent:
sudo systemctl enable --now trento-agent -
Check the status of the Trento Agent:
sudo systemctl status trento-agent ● trento-agent.service - Trento Agent service Loaded: loaded (/usr/lib/systemd/system/trento-agent.service; enabled; vendor preset: disabled) Active: active (running) since Wed 2021-11-24 17:37:46 UTC; 4s ago Main PID: 22055 (trento) Tasks: 10 CGroup: /system.slice/trento-agent.service ├─22055 /usr/bin/trento agent start --consul-config-dir=/srv/consul/consul.d └─22220 /usr/bin/ruby.ruby2.5 /usr/sbin/SUSEConnect -s [...] -
Repeat this procedure on all SAP hosts that you want to monitor.
Prometheus metrics configuration
Trento collects system metrics (CPU, memory) using different exporters depending on the operating system version:
-
SUSE Linux Enterprise Server for SAP applications 15: Uses
node_exporterin pull mode by default. -
SUSE Linux Enterprise Server for SAP applications 16: Uses Grafana Alloy in push mode.
| SUSE Linux Enterprise Server for SAP applications 15 SP7 also provides Grafana Alloy as an optional package. Users who prefer to use Alloy on SUSE Linux Enterprise Server for SAP applications 15 SP7 can manually install and configure it following the same procedure described for SUSE Linux Enterprise Server for SAP applications 16. |
When using Grafana Alloy (on SUSE Linux Enterprise Server for SAP applications 16 or optionally on SUSE Linux Enterprise Server for SAP applications 15 SP7), additional configuration is required. See the Prometheus integration documentation for details on configuring Alloy.
The following parameters control the metrics collection behavior:
prometheus-mode-
Determines how metrics are collected. Valid values are
pull(default) fornode_exporter-based collection, orpushfor Grafana Alloy-based collection. prometheus-exporter-name-
The name used to identify the exporter in Prometheus. Defaults to
node_exporterin pull mode orgrafana_alloyin push mode.
Pull mode parameters (SUSE Linux Enterprise Server for SAP applications 15)
These parameters apply when prometheus-mode is set to pull (the default):
prometheus-node-exporter-target-
Specifies IP address and port for the node exporter as
<ip_address>:<port>. In situations where the host has multiple IP addresses and/or the exporter is listening to a port different from the default one, configuring this setting enables Prometheus to connect to the correct IP address and port of the host. If not set, Prometheus uses the lowest IPv4 address discovered in the host with default port 9100.
The legacy parameter name node-exporter-target is still supported for backward compatibility.
|
Push mode parameters (Grafana Alloy)
These parameters apply when prometheus-mode is set to push, which is required for SUSE Linux Enterprise Server for SAP applications 16 and optional for SUSE Linux Enterprise Server for SAP applications 15 SP7. They are used both by the agent and by the trento-agent generate alloy command to produce the Grafana Alloy configuration:
prometheus-url-
The Prometheus remote write endpoint URL where Alloy will push metrics. Required in push mode.
prometheus-scrape-interval-
The interval at which Alloy scrapes local metrics. Defaults to
15s. Used bytrento-agent generate alloyonly. prometheus-auth-
The authentication method for the Prometheus remote write endpoint. Valid values are
none,basic(default),bearer, ormtls. Used bytrento-agent generate alloyonly. prometheus-auth-username-
Username for basic authentication. Required when
prometheus-authis set tobasic. Used bytrento-agent generate alloyonly. prometheus-auth-password-
Password for basic authentication. Required when
prometheus-authis set tobasic. Used bytrento-agent generate alloyonly. prometheus-auth-bearer-token-
Bearer token for authentication. Required when
prometheus-authis set tobearer. Used bytrento-agent generate alloyonly. prometheus-tls-ca-cert-
Path to CA certificate file for TLS verification. Used by
trento-agent generate alloyonly. prometheus-tls-client-cert-
Path to client certificate file for mTLS authentication. Required when
prometheus-authis set tomtls. Used bytrento-agent generate alloyonly. prometheus-tls-client-key-
Path to client private key file for mTLS authentication. Required when
prometheus-authis set tomtls. Used bytrento-agent generate alloyonly.
The trento-agent generate alloy command reads these parameters to generate the Grafana Alloy configuration file. See the Prometheus integration documentation for detailed instructions on deploying the generated configuration.
|
Automated Installation with Ansible
You can perform an automated installation of Trento using RPM packages with Ansible playbooks provided by the ansible-trento package.
Supported operating systems
Execute the playbooks only on target nodes running SUSE Linux Enterprise Server for SAP applications 15-SP5 and higher, or 16.0 and higher. The supported SUSE Linux Enterprise Server for SAP applications systems for the control node are the same. However, the requirements for the control nodes are less strict. You can use any operating system if the installed Ansible version is compatible with the Python interpreter available on the managed target nodes. Refer to the support matrix in the Ansible documentation.
|
Currently, Trento Server cannot be installed with the Ansible playbook on target nodes running SUSE Linux Enterprise Server for SAP applications 15 SP5. |
Requirements
As a prerequisite, enable the following modules on SUSE Linux Enterprise Server for SAP applications 15.
Replace x with your SP version.
Control node module requirements:
-
Enable the Systems Management module (not needed for SP5).
sudo SUSEConnect -p sle-module-systems-management/15.x/x86_64This repository contains Ansible.
Target node module requirements:
-
Enable the Python 3 module.
sudo SUSEConnect -p sle-module-python3/15.x/x86_64This repository contains essential Python dependencies.
-
Enable SUSE Package Hub.
sudo SUSEConnect -p PackageHub/15.x/x86_64This module is optional. Use it when you need to install Prometheus.
Additionally, install the following packages regardless of the operating system version.
Control node package requirements:
-
Install Ansible.
sudo zypper install ansible
Target node package requirements:
-
Install Python version 3.11 or higher.
sudo zypper install python311
Installation
For SLES-based operating systems, install the ansible-trento package using Zypper.
sudo zypper install ansible-trentoComponents
The playbooks comprise the following components.
Trento Server components:
web-
The main component of the Trento Server, containing the backend and frontend.
wanda-
Checks engine component.
Trento Agent:
agent-
Agent collecting information and processing commands, installed on SAP infrastructure host machines.
Third-party dependencies:
PostgreSQL-
Database server.
RabbitMQ-
Messaging broker.
Prometheus-
Metrics collecting and processing server.
NGINX-
HTTP server used as reverse proxy.
Diagnostics tooling:
supportutils-
Installs the SUSE
supportutilspackage and the Trento-specificsupportutils-plugin-trentoplug-in on Trento Server and Trento Agent hosts, so thatsupportconfigcan collect Trento diagnostics.
The ansible-trento package provides an Ansible role for every one of these components.
Playbooks overview
Trento provides the following playbooks:
server-
Installs Trento Server components (Web and Wanda) along with the supporting third-party application dependencies.
agent-
Installs and configures the Trento Agent.
site-
Performs a full Trento installation. It installs both the server components and agents. An additional feature of this playbook is that the API key for the agents is automatically retrieved from the Trento Server and passed to the deployed agents.
cleanup-
Tries to undo operations performed by executing the other playbooks. It only reverts a subset of the operations. Consult the code of that playbook for full details.
Setting up the inventory
Prepare an inventory file for your Ansible deployment.
Create an inventory.yml file defining the IP addresses or domain names of the target nodes for each group expected in the playbooks.
The inventory must have the following structure:
all:
  children:
    trento_server:
      hosts:
        vitellone:
          ansible_host: "your-host"
          ansible_user: "your-user"
          ansible_ssh_private_key_file: "/home/user/.ssh/id_rsa"
    postgres_hosts:
      hosts:
        vitellone:
          ansible_host: "your-host"
          ansible_user: "your-user"
          ansible_password: "your-password"
    rabbitmq_hosts:
      hosts:
        vitellone:
          ansible_host: "your-host"
          ansible_user: "your-user"
          ansible_ssh_private_key_file: "/home/user/.ssh/id_rsa"
    prometheus_hosts:
      hosts:
        vitellone:
          ansible_host: "your-host"
          ansible_user: "your-user"
          ansible_ssh_private_key_file: "/home/user/.ssh/id_rsa"
   agents:
     hosts:
       vitellone:
          ansible_host: "your-host"
          ansible_user: "your-user"
          ansible_password: "your-password"
In this example, every component is installed on the same host, named vitellone.
Adapt this example to your concrete case.
You can skip certain host groups if you are not provisioning them with ansible-trento.
For example, skip defining postgres_hosts if you use a PostgreSQL installation managed by an external team.
If you only use the agent playbook, define only agents in your inventory.
Refer to the Configuration section to see how to make ansible-trento skip provisioning a given component.
In the example above, a mixture of authentication methods accesses the target nodes.
When using SSH to connect (ansible_ssh_private_key_file), ensure all target nodes contain the public key of the control node.
To copy your public key from the control node to the target node, use the following command:
ssh-copy-id USERNAME@IP_OR_DOMAIN_NAME_OF_THE_NODERunning the playbooks
To run a playbook, use the following command:
ansible-playbook -i PATH_TO_INVENTORY suse.trento.PLAYBOOK_NAMEReplace PLAYBOOK_NAME with one of the following: server, agent, or
site.
Configuration
You can configure two types of variables: playbook-level and role-level variables. They differ in how you configure them and the scope of the changes they imply. We try to keep playbook-level variables to a minimum.
Playbook-level configuration
These variables affect how the playbooks execute. The available configuration options are:
provision_postgres-
Whether to install and configure PostgreSQL.
provision_prometheus-
Whether to install and configure Prometheus.
provision_rabbitmq-
Whether to install and configure RabbitMQ.
provision_proxy-
Whether to install and configure a reverse proxy like NGINX.
Supply playbook-level variables using --extra-vars or -e on the command line during every playbook execution:
ansible-playbook -i PATH_TO_INVENTORY suse.trento.site -e provision_postgres=false -e provision_rabbitmq=false|
When disabling the provisioning of a Trento component, you must manually set the respective |
Role-level configuration
Almost all settings are configured via role-level variables.
Set them in the inventory file under the vars: section:
all:
  children:
    trento_server:
      hosts: ...
    postgres_hosts:
      hosts: ...
    rabbitmq_hosts:
      hosts: ...
    prometheus_hosts:
      hosts: ...
    agents:
      hosts: ...

  vars:
    trento_server_name: "trento-deployment.example.com"
    trento_web_admin_password: "adminpassword"
    trento_web_postgres_password: "postgres"
    trento_wanda_postgres_password: "postgres"
    trento_rabbitmq_password: "guest"
    rproxy_ssl_cert: "SSL_CERTIFICATE_IN_BASE64"
    rproxy_ssl_key: "SSL_CERTIFICATE_KEY_IN_BASE64"
Certain role-level variables are mandatory.
For Trento Server, these are:
| Name | Description |
|---|---|
|
Domain name of the Trento web application. |
|
Password of the admin user in Web component. |
|
Password of the PostgreSQL user used in Web component. |
|
Password of the PostgreSQL user used in Wanda component. |
|
Password of the RabbitMQ user configured for the Trento project. |
|
String with the content of the |
|
String with the content of the |
For Trento Agent, they are:
| Name | Description |
|---|---|
|
API key for accessing the Trento Web collection endpoint. |
The rest of the variables are optional. You can find the full listing on the Trento Ansible project page.
Support tooling
The server, agent, and site playbooks install the SUSE supportutils package together with the Trento-specific supportutils-plugin-trento plug-in.
This allows supportconfig to collect Trento diagnostics on both Trento Server and Trento Agent hosts.
The installation is performed by the supportutils role and is enabled by default; no additional opt-in is required.
Configuration
Override the following role-level variables in your inventory to change the default behavior:
| Name | Default | Description |
|---|---|---|
|
|
Set to |
|
|
Base SUSE diagnostics package name. |
|
|
Trento plug-in package name. |
|
|
Refresh the Zypper cache before installing. |
To disable installation on all hosts, set the variable in the vars: section of your inventory:
all:
  vars:
supportutils_enabled: falseExample scenarios
The playbooks in ansible-trento allow for different installation scenarios.
Every component on a dedicated node
The following inventory file installs every Trento component on a different host. It also enables and configures optional e-mail alerting:
all:
  children:
    trento_server:
      hosts:
        vitellone:
          ansible_host: "your-host"
          ansible_user: "your-user"
    postgres_hosts:
      hosts:
        vitellone-pg:
          ansible_host: "your-host"
          ansible_user: "your-user"
    rabbitmq_hosts:
      hosts:
        vitellone-mq:
          ansible_host: "your-host"
          ansible_user: "your-user"
    prometheus_hosts:
      hosts:
        vitellone-metrics:
          ansible_host: "your-host"
          ansible_user: "your-user"
    agents:
      hosts:
        hana01:
          ansible_host: "your-hana01-host"
          ansible_user: root
        hana02:
          ansible_host: "your-hana02-host"
          ansible_user: root

  vars:
    trento_server_name: "yourserver.com"
    trento_web_admin_password: "adminpassword"
    trento_web_postgres_password: "pass"
    trento_wanda_postgres_password: "wanda"
    trento_rabbitmq_password: "trento"
    rproxy_ssl_cert: |-
      -----BEGIN CERTIFICATE-----
      MIIEZDCCA0ygAwIBAgIUAue46Y/9kwT+zvPPW2xfuNv1+Z4wDQYJKoZIhvcNAQEL
      ...
      vzczKRPmQOQbiu02WM2hivWtPBH//A5N
      -----END CERTIFICATE-----
    rproxy_ssl_key: |-
      -----BEGIN PRIVATE KEY-----
      MIIEvQIBADANBgkqhkiG9w0BAQEFAASCBKcwggSjAgEAAoIBAQC1L7Ddc6oYaNPC
      ...
      mpNiKDOPALNTs+Ukdkt5KlE=
      -----END PRIVATE KEY-----

    web_enable_alerting: true
    web_alert_sender: "trento@example.com"
    web_alert_recipient: "trento_maintainers@example.com"
    web_smtp_server: "smtp.example.com"
    web_smtp_port: 587
    web_smtp_user: "smtp_user"
    web_smtp_password: "stmp_pass"
Execute Ansible by running the following command:
ansible-playbook -i PATH_TO_INVENTORY suse.trento.siteTrento with externally managed PostgreSQL, RabbitMQ and Prometheus
The following inventory file does not provision PostgreSQL, RabbitMQ, or Prometheus.
|
There is no configuration for |
all:
  children:
    trento_server:
      hosts:
        vitellone:
          ansible_host: "your-host"
          ansible_user: "your-user"
    agents:
      hosts:
        hana01:
          ansible_host: "your-hana01-host"
          ansible_user: root
        hana02:
          ansible_host: "your-hana02-host"
          ansible_user: root

  vars:
    trento_postgres_host: "yourexternalpg.com"
    trento_rabbitmq_host: "yourexternalrabbit.com:5671"

    trento_server_name: "your-servername.com"
    trento_web_admin_password: "adminpassword"
    trento_web_postgres_username: "postgres"
    trento_web_postgres_password: "trentoansible1"
    trento_wanda_postgres_username: "postgres"
    trento_wanda_postgres_password: "trentoansible1"
    trento_rabbitmq_username: "trentoansible"
    trento_rabbitmq_password: "trentoansible1"
    rproxy_ssl_cert: |-
      -----BEGIN CERTIFICATE-----
      MIIEZDCCA0ygAwIBAgIUAue46Y/9kwT+zvPPW2xfuNv1+Z4wDQYJKoZIhvcNAQEL
      ...
      vzczKRPmQOQbiu02WM2hivWtPBH//A5N
      -----END CERTIFICATE-----
    rproxy_ssl_key: |-
      -----BEGIN PRIVATE KEY-----
      MIIEvQIBADANBgkqhkiG9w0BAQEFAASCBKcwggSjAgEAAoIBAQC1L7Ddc6oYaNPC
      ...
      mpNiKDOPALNTs+Ukdkt5KlE=
      -----END PRIVATE KEY-----
Execute Ansible using the following command:
ansible-playbook -i PATH_TO_INVENTORY suse.trento.site -e provision_postgres=false -e provision_rabbitmq=false -e provision_prometheus=falseDeploy only Trento agents
Use the following inventory file to install and configure only the Trento agents.
You must explicitly specify the agent_web_api_key variable.
Acquire this key manually before running the agent playbook alone.
all:
  children:
    agents:
      hosts:
        hana01:
          ansible_host: "your-hana01-host"
          ansible_user: root
        hana02:
          ansible_host: "your-hana02-host"
          ansible_user: root

  vars:
    agent_web_api_key: "yourserver.com"
Execute Ansible by specifying the agent playbook:
ansible-playbook -i PATH_TO_INVENTORY suse.trento.agent|
Custom-tailored inventories are not a requirement. They are used only to highlight which parameters are needed in specific cases. You can easily use a single, fully populated inventory and run only a subset of the operations, such as installing only the agent or skipping the PostgreSQL installation. The playbook automatically picks up or skips variables in the inventory as appropriate for the desired execution configuration. |
Reference
For more information, refer to the Trento Ansible project page.