Release Process
To issue a new version of a Trento component (such as Web, Agent, or Wanda), follow the procedure described in this document in the context of the respective repository.
Most of this process is automated via GitHub Actions.
Branching Strategy
The Trento branching strategy fulfills the following objectives:
-
It is straightforward.
-
It allows for quick releases when necessary.
-
It enables simple versioning for nightly builds.
For nightly builds, the versioning must ensure that the latest build always sorts higher than the latest official release. While this is easier with linear versioning, the need to release small fixes before features are complete requires a multi-branch approach.
Therefore, Trento uses a semi-linear branching and release approach. A Trento repository maintains two long-running branches:
main-
Contains newly developed features. It is kept stable at all times by using Pull Requests, Peer Reviews, and automated CI checks before any new code integration.
release-
Contains the code from
mainthat is ready for release, plus potential small custom fixes.
Trento supports two types of releases:
- Full releases
-
Created by cross-merging the
mainandreleasebranches and tagging the resulting merge commit. This merge commit is shared by both branches because when one branch is merged into the other, the reverse operation is a fast-forward merge. Full releases contain all new features developed onmainsince the last full release. - Hotfix releases
-
Allow for quick reactions to unforeseen problems with the released code, such as critical bugs or new security CVEs. Hotfix releases are made directly on the
releasebranch and tagged there.
To achieve linear versioning in a straightforward manner, all release tags must be reachable from main.
For instance, built-in tools like git describe should correctly identify the number of commits since the last release.
This is achieved by merging the release branch back into main when performing hotfix releases.
|
This implies that Trento does not support releasing version 2.0.1 if release 3.0.0 already exists. The next possible release must be monotonically increasing (for example, 3.0.1, 3.1.0, or 4.0.0). |
In all merges between the long-running branches, main is taken as the source of truth, and all merge conflicts are auto-resolved in its favor.
|
Not all Trento repositories use this branching strategy. We are currently migrating to this new way of operation. |
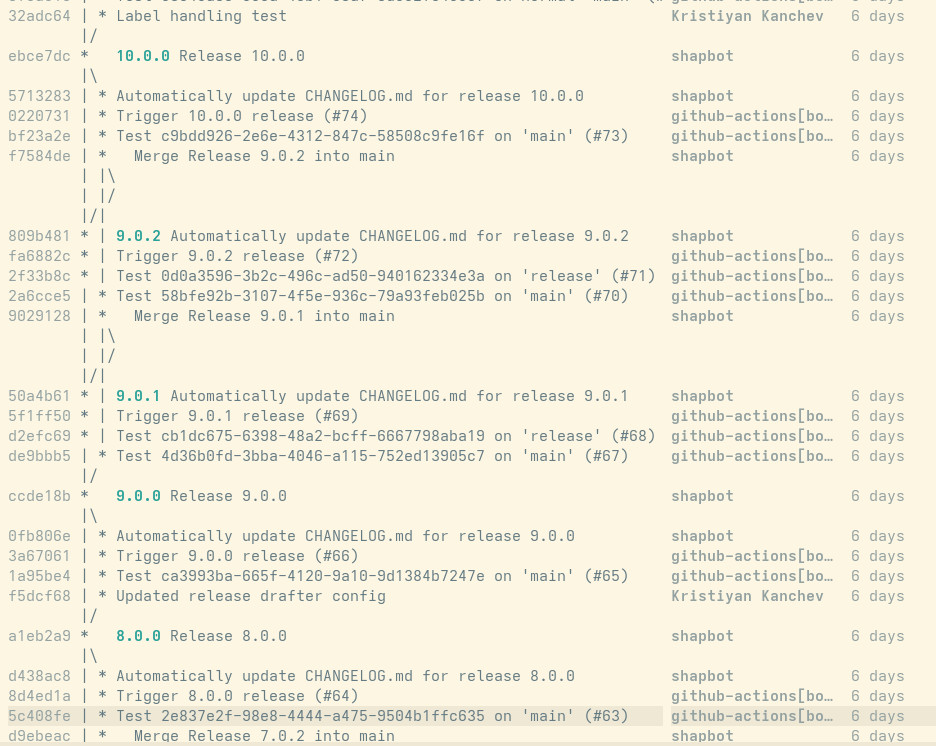
Example of a test repository using this branching strategy:
How to Trigger a Release
The steps to initiate the release process are the same for both release types.
To bump the version, modify the VERSION file at the root of the repository.
Commit this change to the respective branch for the release type.
Because both long-running branches are protected, only administrators can push directly to them.
Other team members must open a pull request.
Successfully merging the VERSION file change on the respective branch triggers the following automated steps:
-
The CI bot automatically generates CHANGELOG entries from the names of the pull requests merged into the respective branch, creating a new commit.
-
The system creates the necessary version tags on the correct branch.
-
It publishes a GitHub release.
-
It builds container images hosted on ghcr.io.
-
It updates SUSE distribution packages in OBS.
|
The standard Continuous Integration step, which occurs on a push to the |
Preparation for Full Releases
There are no special requirements for full releases. When the repository is ready to be released, follow this procedure:
-
Open a pull request (PR) that only updates the version in the
VERSIONfile. -
Target the PR against the
mainbranch. -
Name the PR
Trigger release <version>. -
Add the
skip-release-noteslabel to exclude this PR from the changelog. -
Notify your teammates.
-
Merge the PR.
After merging, the Continuous Integration (CI) system automatically completes the process.
Preparation for Hotfix Releases
Hotfix releases require more preparation work from the person performing the release.
There are two paths you can take when making changes for a hotfix.
However, regardless of which path you choose, the changes introduced on the release branch must be made using a pull request (PR).
Back-Porting
In general, if a problem is discovered in the release code, it exists on both the main and release branches.
Therefore, apply the fix in both places.
It is recommended to first make the fix on main and then back-port it to release.
This lowers the possibility of anomalies when auto-resolving merges in the CI.
When back-porting, follow this procedure:
-
Find the PR that introduced the change on
mainthat you want to back-port. -
Add the
released-as-hotfixlabel to the already closed or merged PR. -
Create a new branch,
<some-hotfix-name>, for your back-port fix, starting from the currentreleasebranch. -
Cherry-pick the changes associated with the origin PR (usually a single squashed commit) from
maininto your<some-hotfix-name>branch. -
Open a new PR targeting the
releasebranch for your<some-hotfix-name>branch. -
Add the
released-as-hotfixlabel to the newly created PR.
|
Ideally, adding the label in the last step should not be necessary. However, this is currently required due to a limitation in the changelog generator. |
Custom Fix Directly on Release
If it is not possible to cherry-pick the change from main directly because it is intertwined with a feature not ready to be released, make the fix directly on the release branch.
Later, when the CI merges release back to main, double-check if everything was resolved correctly.
This is especially important if the fix involves adding or removing files.
Other than that, the only additional step required is to mark the PRs targeting the release branch with the released-as-hotfix label.
To make a custom fix, follow this procedure:
-
Create a new branch,
<some-hotfix-name>, starting fromrelease. -
Add your changes.
-
Open a PR for
<some-hotfix-name>targetingrelease. -
Add the
released-as-hotfixlabel to that PR.
|
Ideally, adding the |
Trigger the Hotfix Release
The remaining steps are the same as for a full release, except the target branch for the PR is different:
-
Open a PR that only updates the version in the
VERSIONfile. -
Target the PR against the
releasebranch. -
Name the PR
Trigger release <version>. -
Add the
skip-release-noteslabel to exclude this PR from the changelog. -
Notify your teammates.
-
Merge the PR.
After merging, the CI automatically completes the process.